Appearance
Client Management
"Clients" are the end_user accounts — the people or businesses LN Services actually files paperwork for. This chapter covers the Clients list, the per-client 360° overview, and the quick standalone Direct Enrollment flow.
Clients list
What it's for
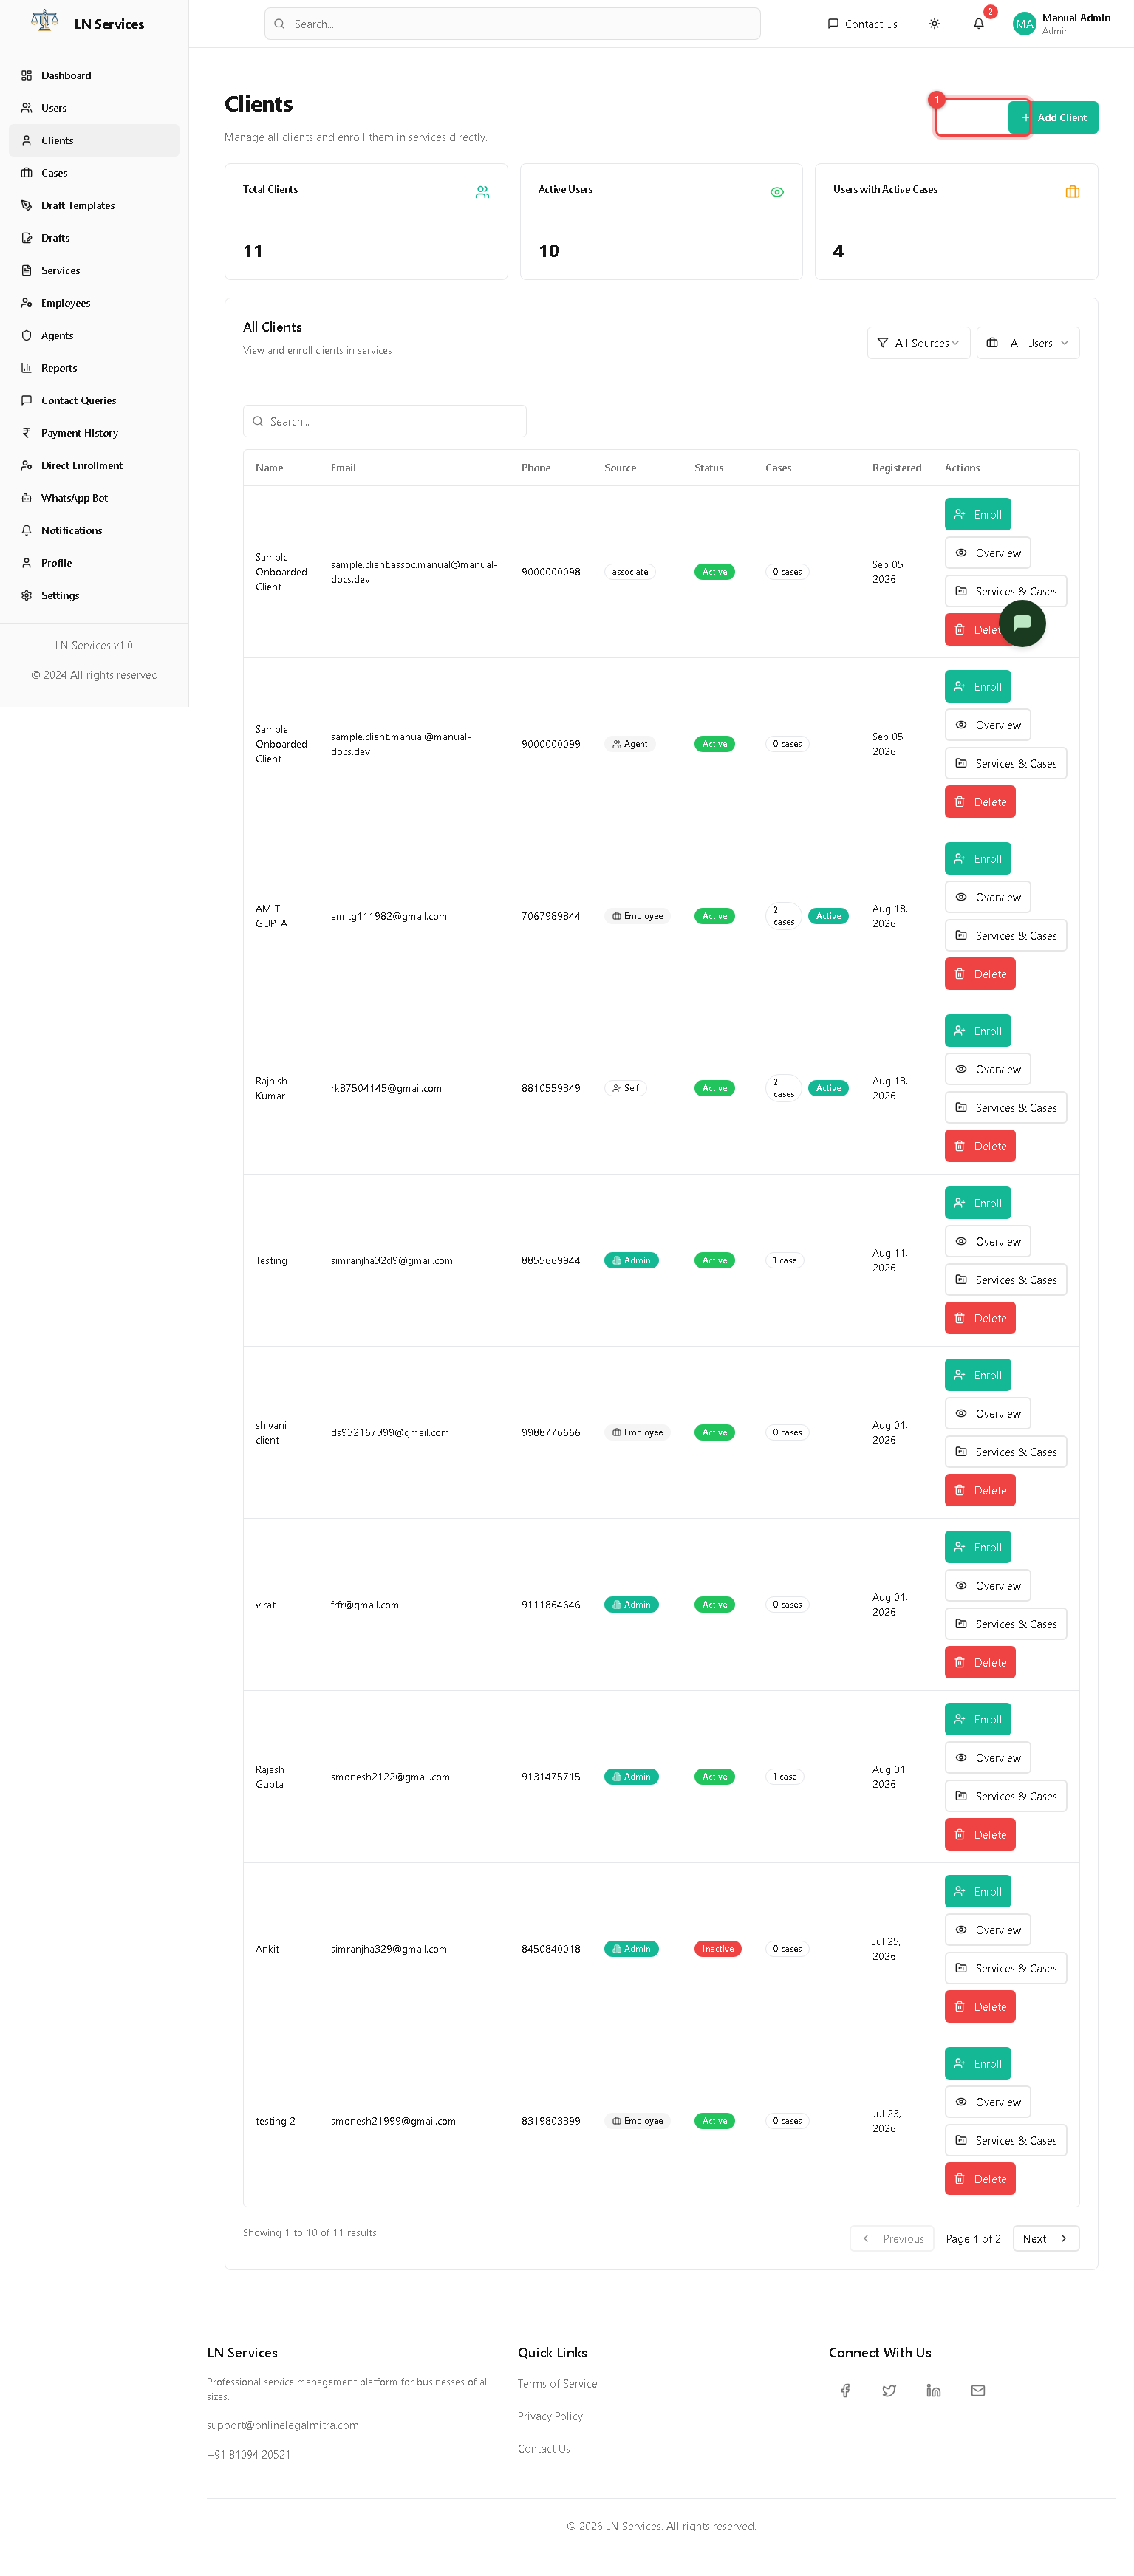
See every client, how they were onboarded (self-registered, via an Agent, or added directly by staff), how many active cases they have, and enroll them into a service.
Steps: add a new client
- Click ① Add Client.
- Enter Name and either Phone/Email, or, if the client came through a referring CA/Partner who won't share their contact details yet, tick "Came via CA/Partner" and pick the referrer instead.
- Optionally pick services to enroll them in right away, and expand Business & Address Details to capture GSTIN/PAN/address up front.
- Save — you can proceed straight to payment if you selected a service.
Steps: enroll an existing client in a service
- Find their row, click Enroll.
- Pick one or more services, optionally assign an employee and add a note.
- Click Proceed to Payment and complete the payment dialog (cash, online/Razorpay, or marked as a test payment).
Steps: view a client's full history
Click Overview on their row — see Client Overview below. Click Services & Cases to jump straight to one of their cases.
Technical Notes
List: GET /api/admin/end-users. Create: POST /api/admin/users (role forced to end_user). Enrollment check: POST /api/admin/check-enrollment-batch (prevents double-enrolling in the same service). A client with noPortalAccess: true (CA/Partner-referred, contact unknown) can never log in even if an email/phone is added later — enforced in the login/forgot-password controllers, not just the UI.
Client Overview
What it's for
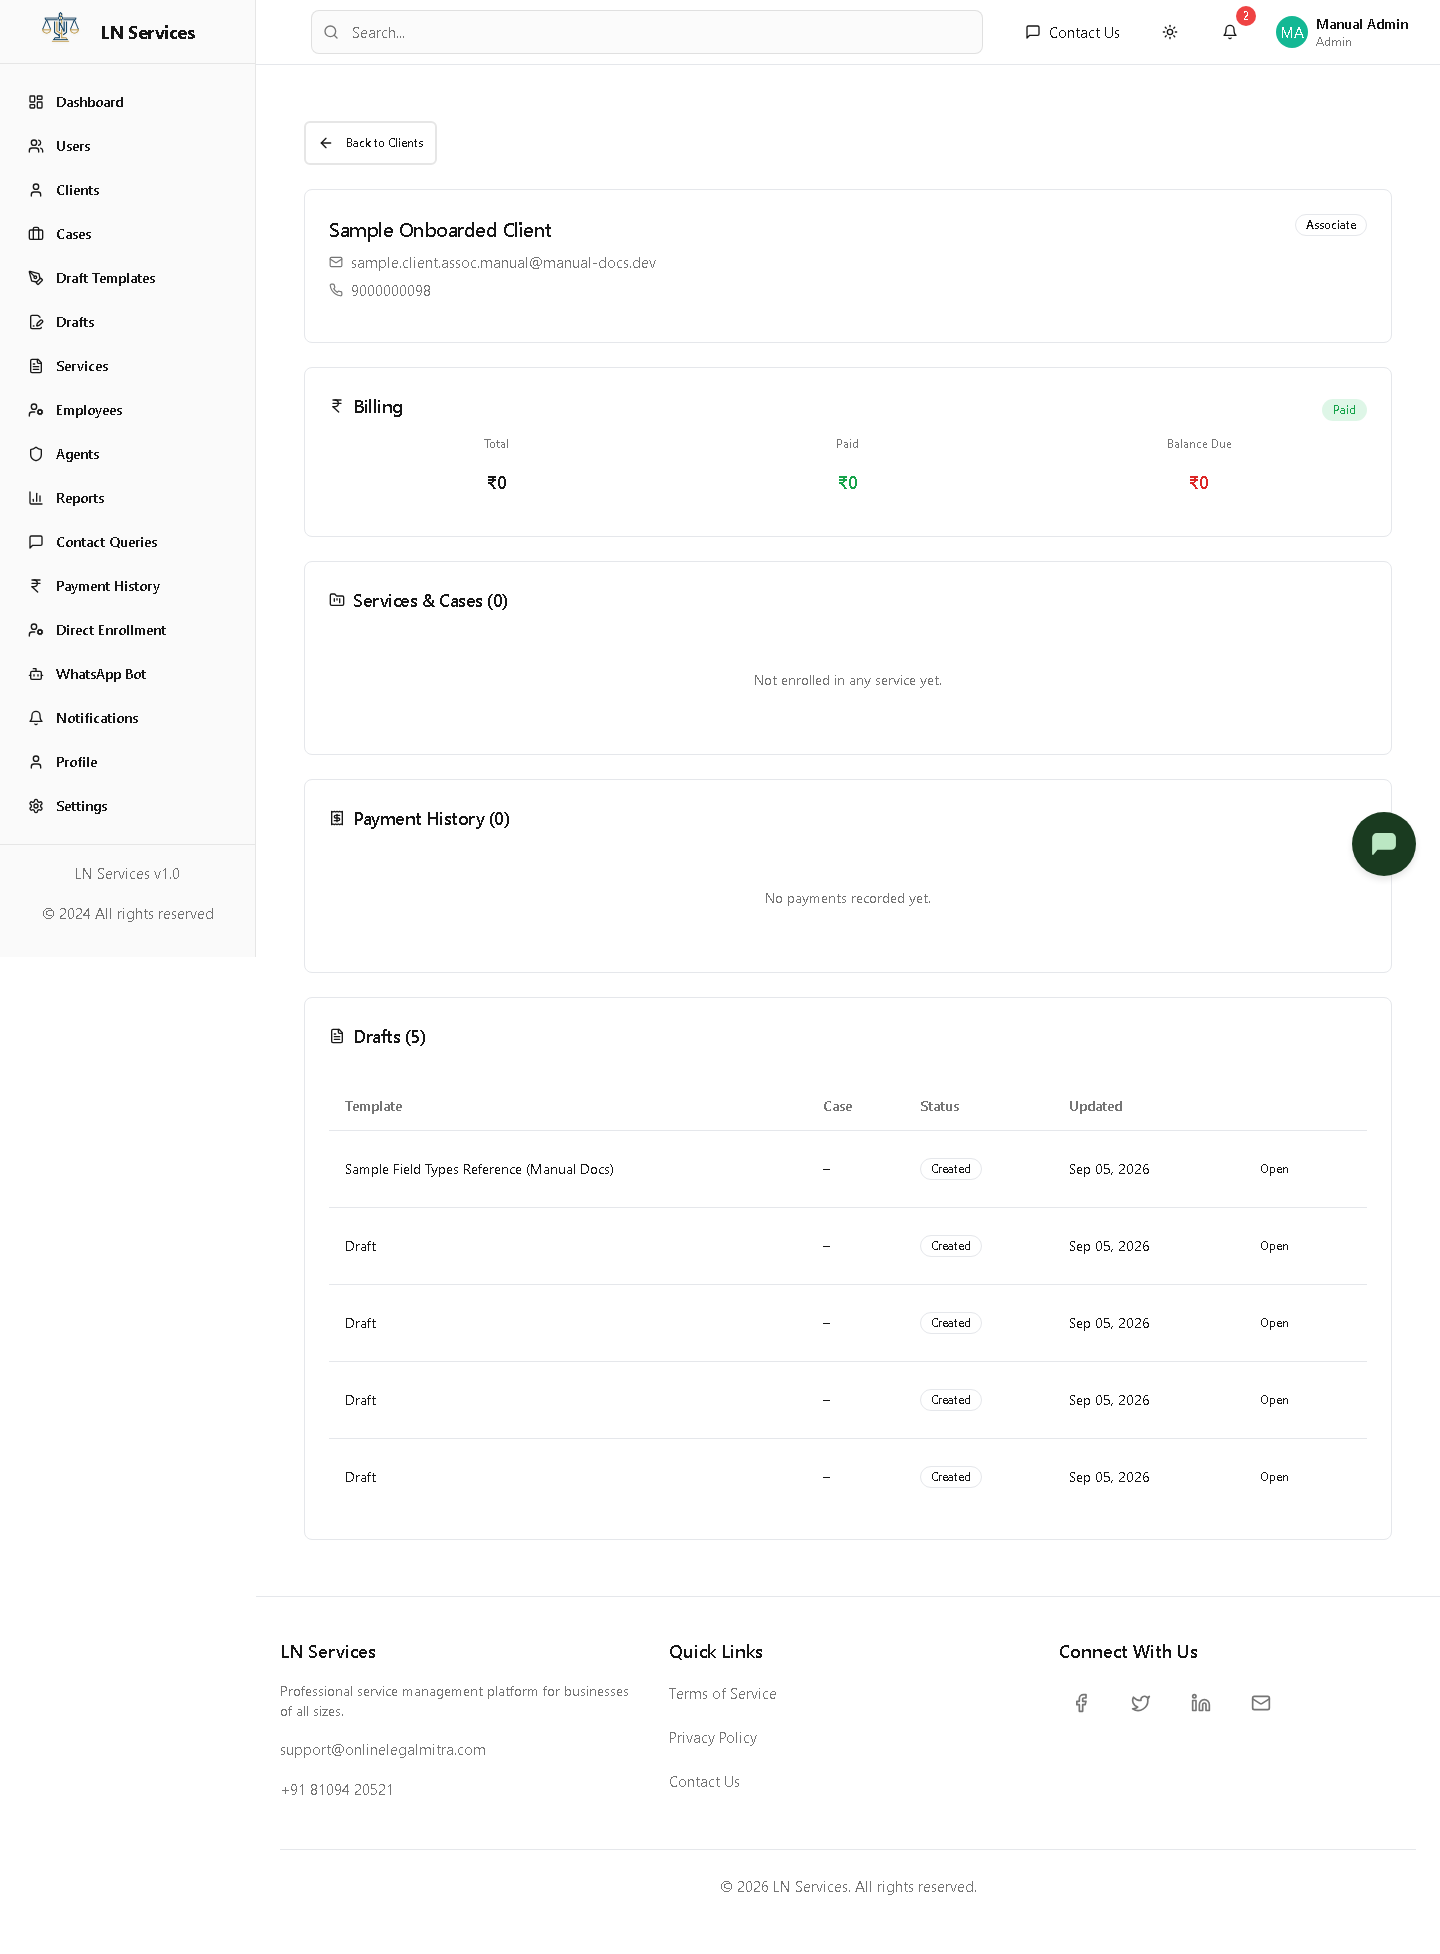
A read-only, single-page summary of one client: contact info, total billing across all their cases, every case and its payment status, full payment history, and their drafts.
Steps
- Click any Case row to open that case in Case Management.
- Click Receipt next to a payment to view/print that receipt.
- Click Open next to a draft to jump into the Draft System.
- Click Back to Clients to return to the list.
Technical Notes
Single call: GET /api/admin/end-users/:id/overview — the backend pre-joins cases, payments, and drafts for that user rather than the frontend making three separate requests.
Direct Enrollment
What it's for
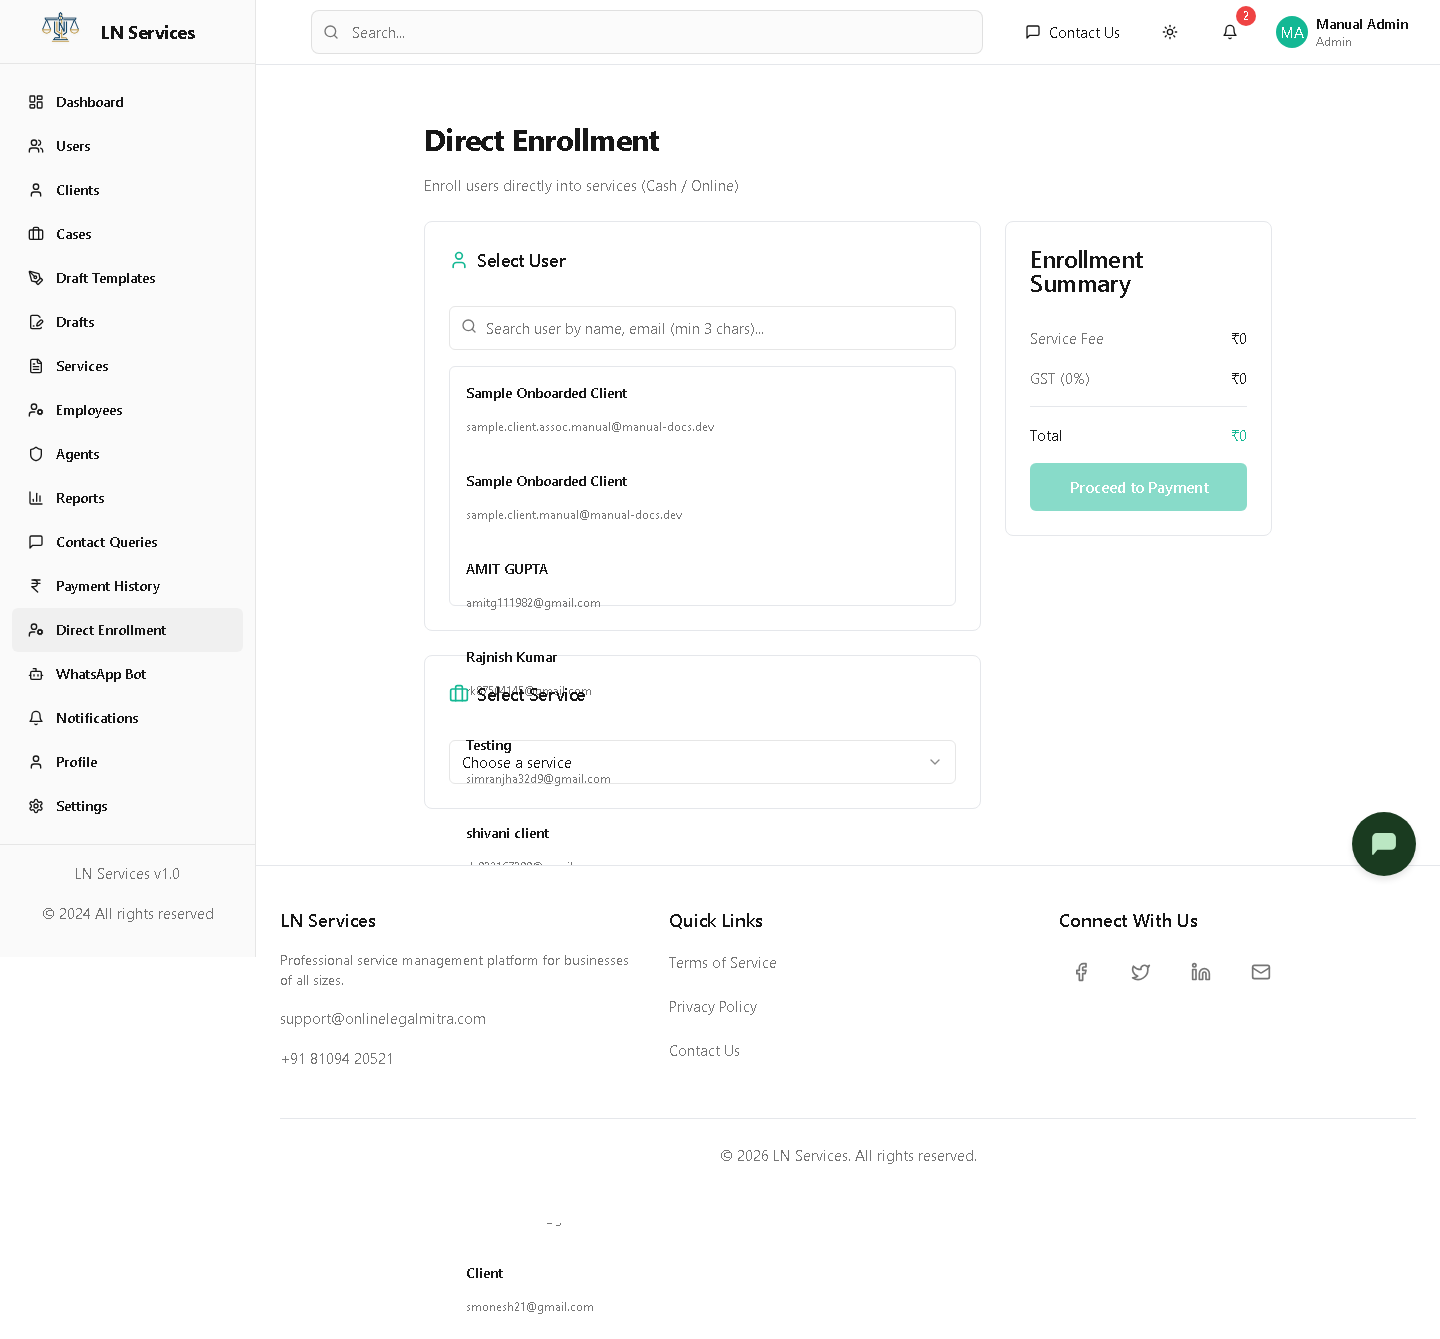
A shortcut for when a staff member is on the phone with a client and just needs to search for them, pick a service, and take payment — without navigating the full Clients table.
Steps
- Search for and click the client in the list.
- Choose a service from the dropdown — the fee and GST total update automatically.
- Click Proceed to Payment. On success you're taken to Case Management, where a new case has been created for this enrollment.
Technical Notes
Reads GET /api/admin/services and GET /api/admin/end-users for the two pickers; payment/enrollment itself goes through the shared PaymentDialog → /api/enrollment flow used everywhere else in the app.