Appearance
Client Management
Clients
What it's for
View and add clients, and enroll them into services — the same capability Admin has, just for the "Clients" section of your sidebar.
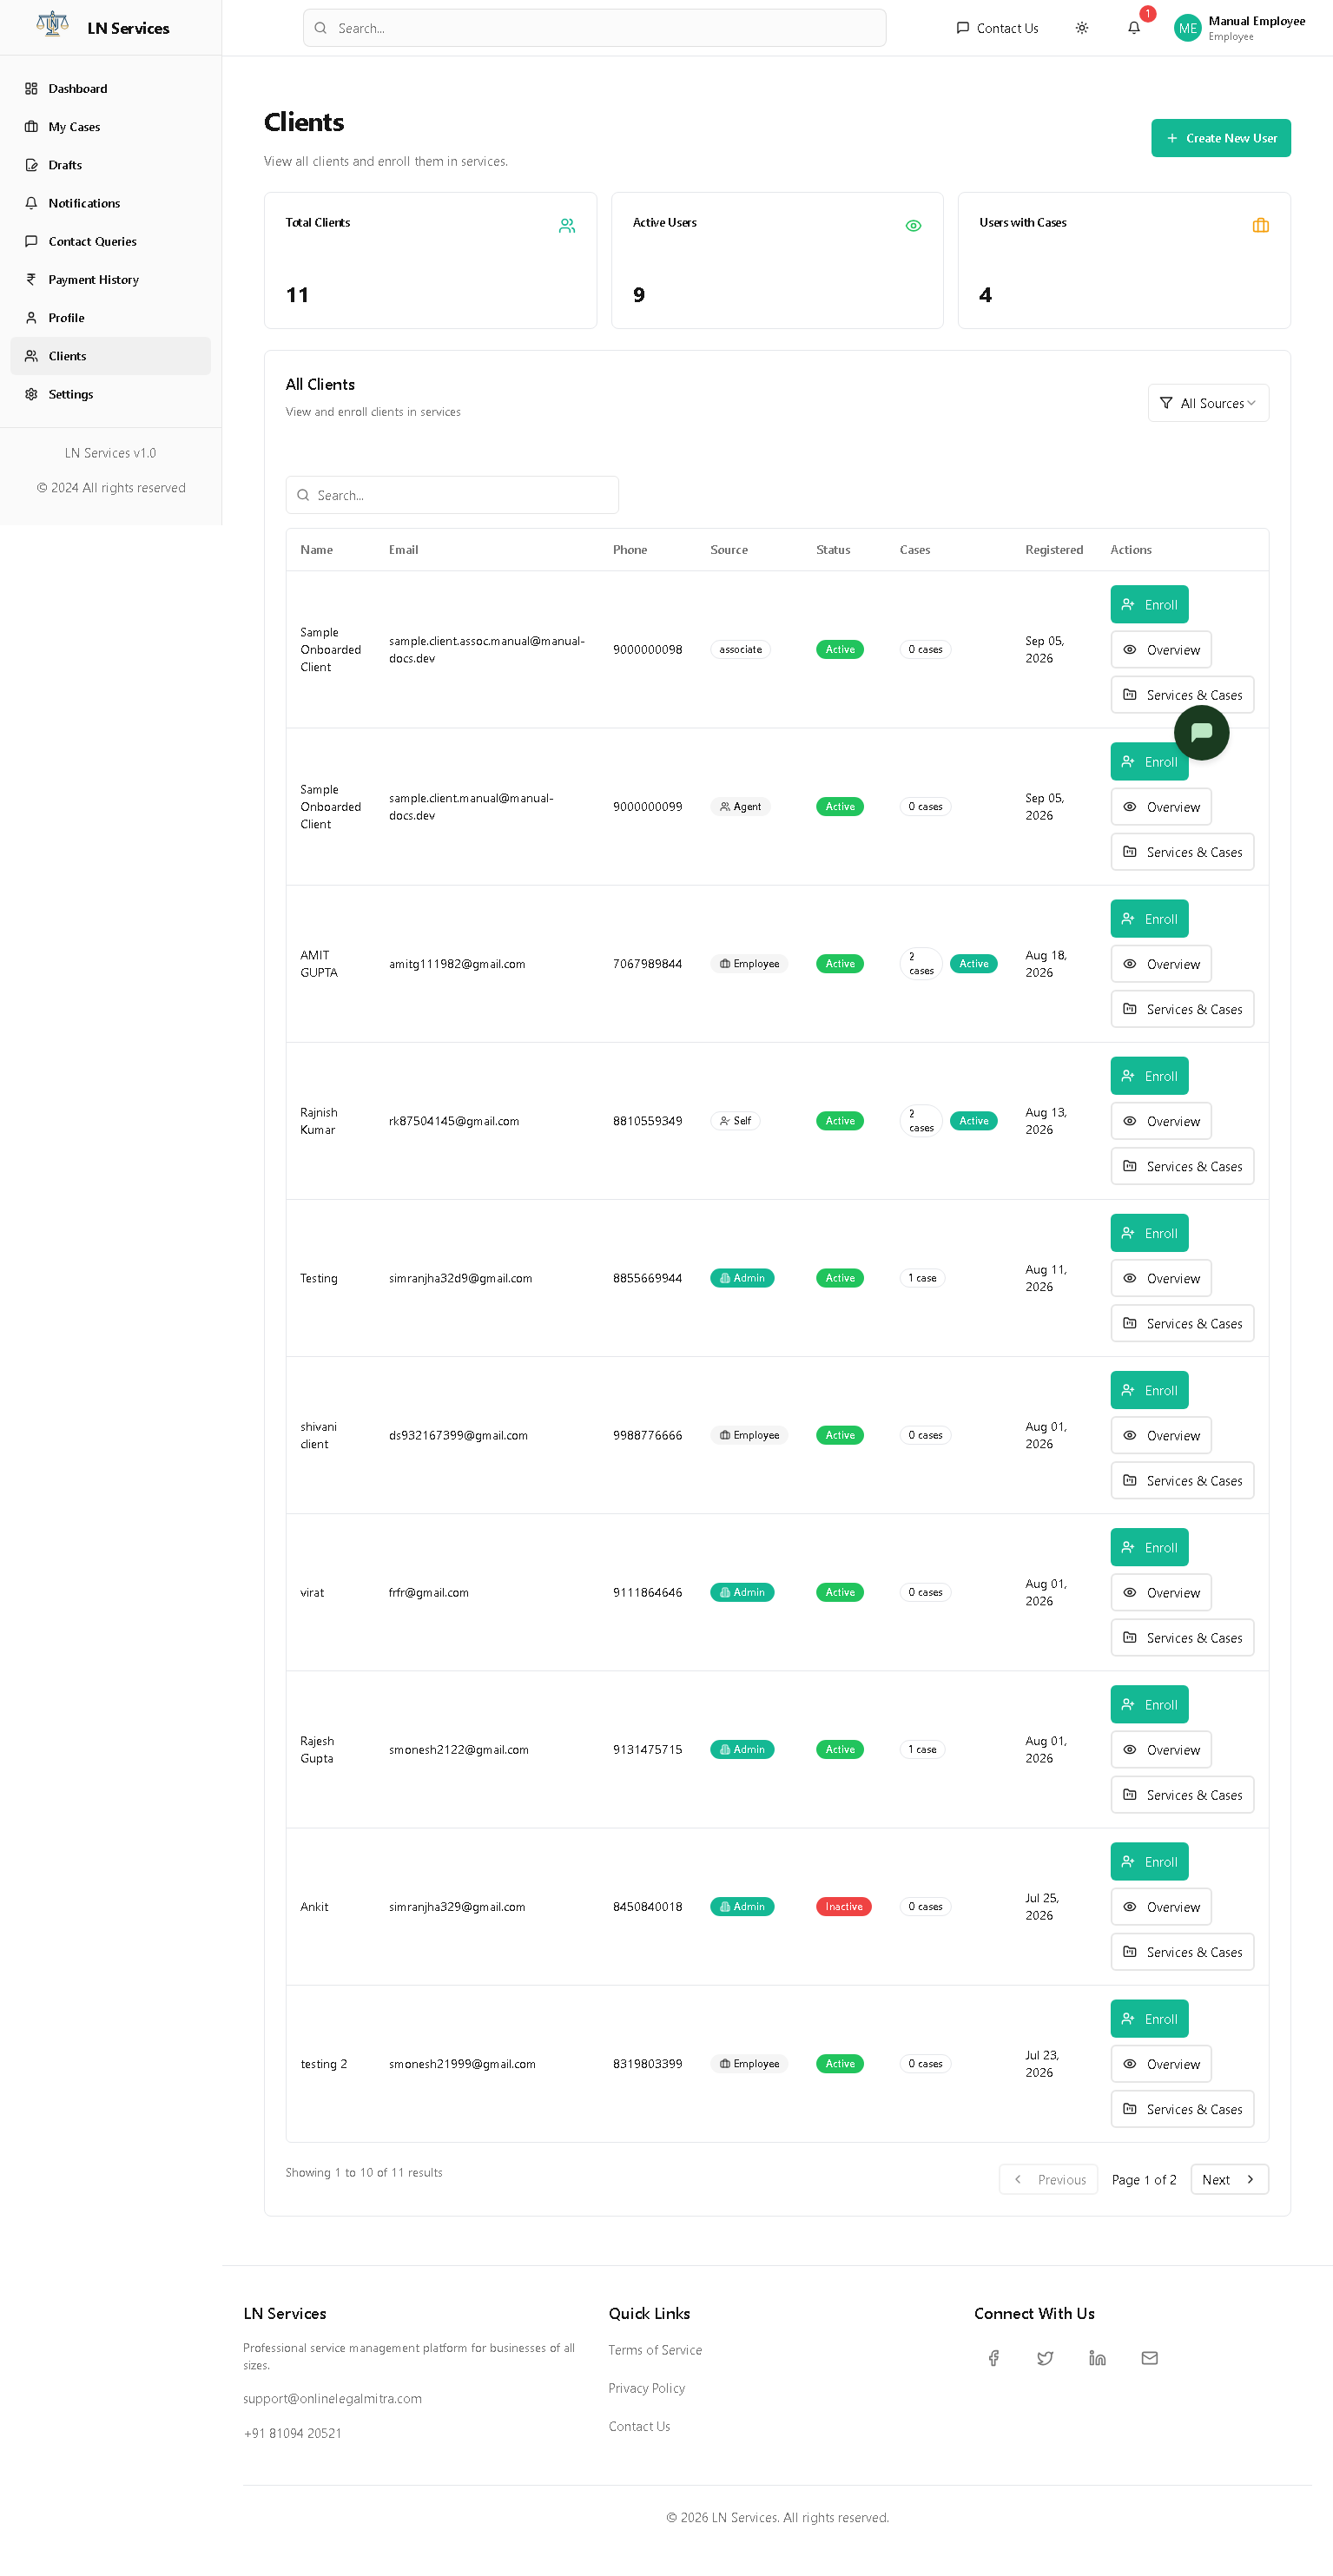
Steps: add a new client
Click Create New User.
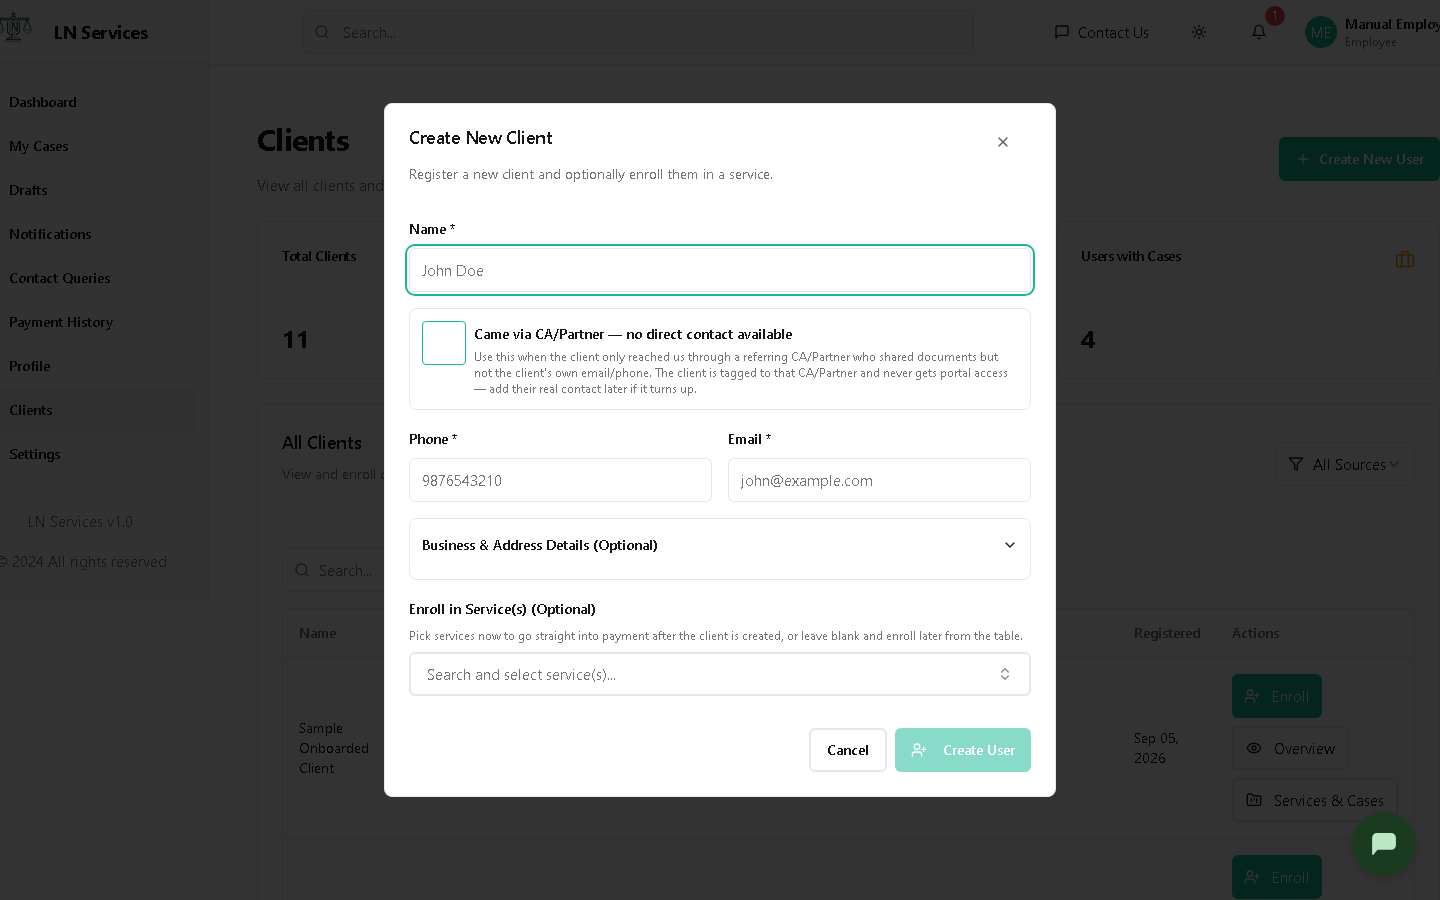
Enter a Name and either Phone/Email, or tick "Came via CA/Partner — no direct contact available" if this client only reached you through a referring CA/Partner. Optionally expand Business & Address Details, and optionally pick services under Enroll in Service(s) to go straight to payment after creating them. Click Create User.
Steps: enroll an existing client
Click Enroll on their row.
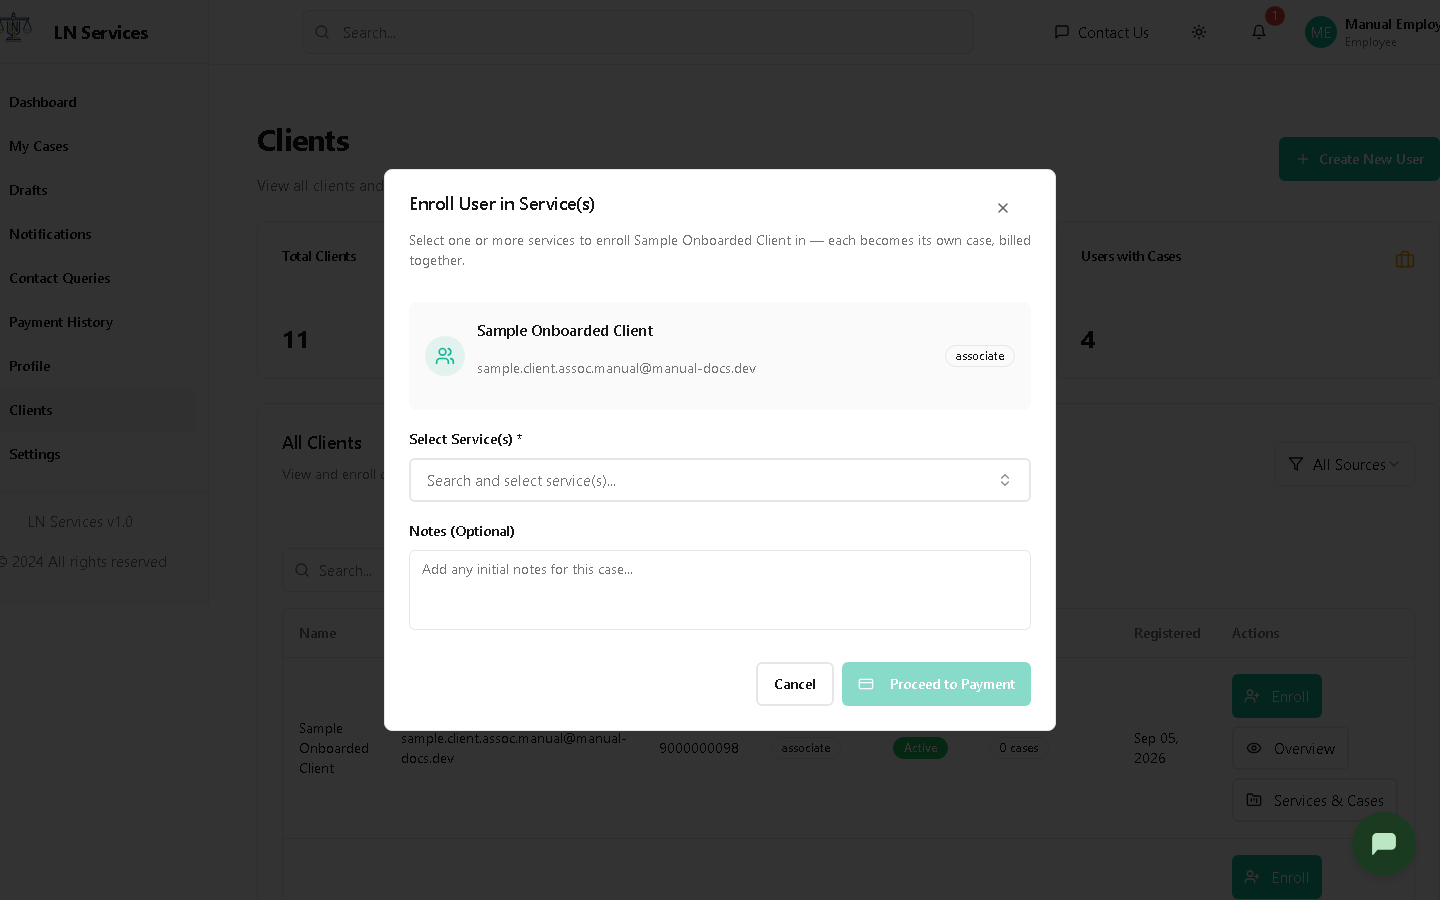
Pick one or more services, add an optional note, and click Proceed to Payment — this opens the same Complete Payment screen shown in the Agent guide (it's the identical shared component everywhere in the app).
Steps: view a client's history
Click Overview on their row for a full read-only summary of their cases, billing, and drafts. Click Services & Cases to jump straight to one of their cases.
Technical Notes
GET /api/employee/end-users, POST /api/employee/users (create), POST /api/employee/check-enrollment-batch (prevents double-enrolling in the same service), GET /api/employee/end-users/:id/overview (client overview), GET /api/employee/end-users/:id/cases. Employees have the same client-creation and enrollment rights as Admin — this is not a restricted capability.